用 Docker Distribution 建立第一個 TLS 容器倉庫
遇過非常多人使用 docekr-distribution 和 RHEL/CentOS 來建立人生第一個容器映像檔倉庫 (Container Registry) 時,都會遇到 SSL/TLS 相關的問題,大多都是用 insecure-registries 來避掉,今天要來分享自簽憑證的作法
系統規格
- Hostname: rhel7.misc.local
- IP: 10.0.100.7/24
- Necessary Software
- docker-distribution 2.6.2
- RHEL 7.7
- skopeo 0.1.37
安裝過程
準備 OS
Firewalld、SELinux預設開啟- 以 RHEL7 為核心
Docker Distribution
安裝 docker-distribution
設定 docker-distribution
cat << EOF > /etc/docker-distribution/registry/config.yml
---
version: 0.1
log:
  fields:
    service: registry
storage:
    cache:
        layerinfo: inmemory
    filesystem:
        rootdirectory: /var/lib/registry
http:
    addr: 0.0.0.0:5000
    host: https://rhel7.misc.local:5000
    tls:
      certificate: /etc/docker-distribution/my_self_signed_cert.crt
      key: /etc/docker-distribution/my_self_signed.key
EOF
依據上述的設定檔,/var/lib/registry 是指定主要放置 Container Images 檔案的位置,如果嫌太小的話,可以掛 Shared Storage;:5000 開的 Port 預設是 5000,但可以依據需求修改;certificate、key 則是放置 SSL/TLS 的金鑰和憑證,後面會講怎麼快速自簽;若想要瞭解更多的設定檔,可以參考 Docker Official - Configuring a registry
自簽 OpenSSL
# Command for SSL Cert
openssl req -x509 -nodes -days 3650 -newkey rsa:2048 \
-keyout /etc/docker-distribution/my_self_signed.key \
-out /etc/docker-distribution/my_self_signed_cert.crt

# Sample Out
Generating a 2048 bit RSA private key
......+++
.................+++
writing new private key to '/etc/docker-distribution/my_self_signed.key'
-----
You are about to be asked to enter information that will be incorporated
into your certificate request.
What you are about to enter is what is called a Distinguished Name or a DN.
There are quite a few fields but you can leave some blank
For some fields there will be a default value,
If you enter '.', the field will be left blank.
-----
Country Name (2 letter code) [XX]: TW
State or Province Name (full name) []: Taipei
Locality Name (eg, city) [Default City]: Taipei City
Organization Name (eg, company) [Default Company Ltd]: Red Hat
Organizational Unit Name (eg, section) []: Solution Architect
Common Name (eg, your name or your server\'s hostname) []: rhel7.misc.local
Email Address []: [email protected]
Common Name (eg, your name or your server\'s hostname) 務必要填自己的 hostname
# Configure RHEL to trust the self-signed certificate
# You should put the pem into /etc/pki/ca-trust/source/anchors/
openssl x509 \
-in /etc/docker-distribution/my_self_signed_cert.crt \
-out /etc/pki/ca-trust/source/anchors/workstation.pem \
-outform PEM

# Update the system's trust store
update-ca-trust
建議把 /etc/docker-distribution/my_self_signed_cert.crt 這檔案放到一個可以讓其他機器下載的地方,未來只要有需要用到該 Container registry 的服務,都要執行上面的動作匯入憑證
啟用 Firewall
firewall-cmd --zone=public --add-port=5000/tcp --permanent
firewall-cmd --reload
firewall-cmd --zone=public --list-all
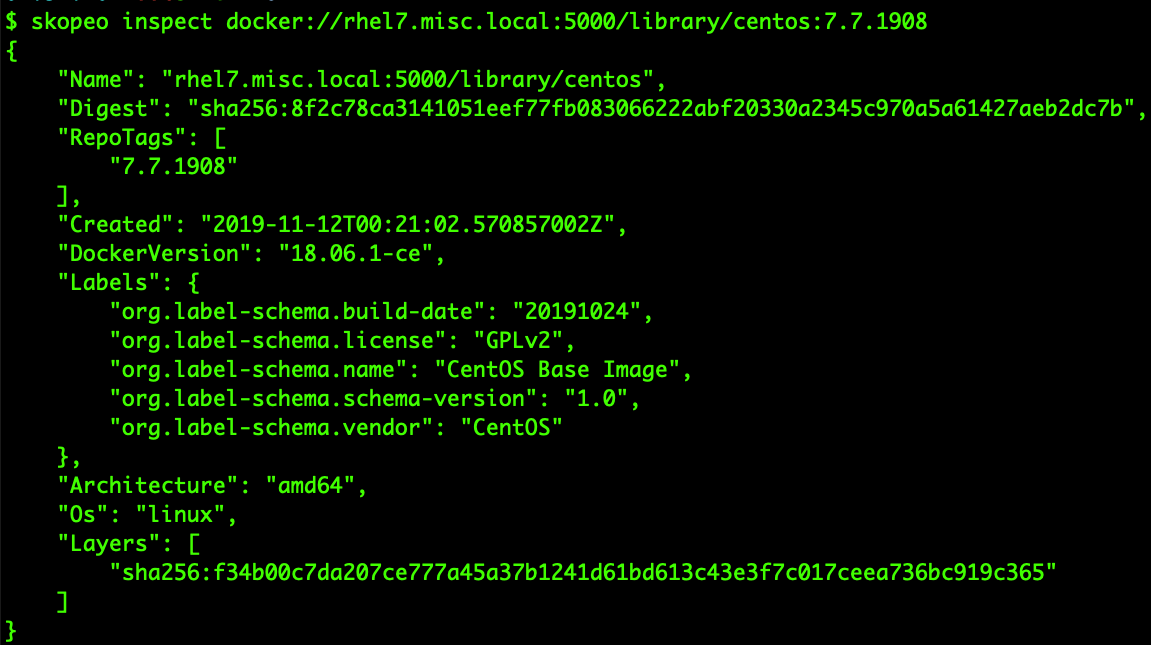
驗證 Container Registry
# Install
yum install -y skopeo

# Copy the image from DockerHub to on-premise container registry
skopeo copy docker://docker.io/library/centos:7.7.1908 docker://rhel7.misc.local:5000/library/centos:7.7.1908

# Inspect the information of specific container
skopeo inspect docker://rhel7.misc.local:5000/library/centos:7.7.1908

結語
整個過程其實蠻簡單的,大概不用半小時就可以建立完,但他能提供的功能,就是非常基本中的基本 - 放映像檔,若要尋求多功能的 Container Registry,可以考慮使用紅帽宣布 Red Hat Introduces open source Project Quay container registry 的 Project Quay,比較符合現實生活。